Grand Opening of the New Avocado Pesto Blog
I would like to introduce the redesigned Avocado Pesto food blog. The new blog url is http://avocadopesto.com and unfortunately it seems that all of my subscribers here have not been automatically transferred to the new blog. If you are still interested in following my culinary adventures please head over to the new Avocado Pesto and enter your email address once more or click here (you’ll be able to subscribe via reader now).
Also, if you have bookmarked any of my pages – not to worry, those all redirect to the new blog!
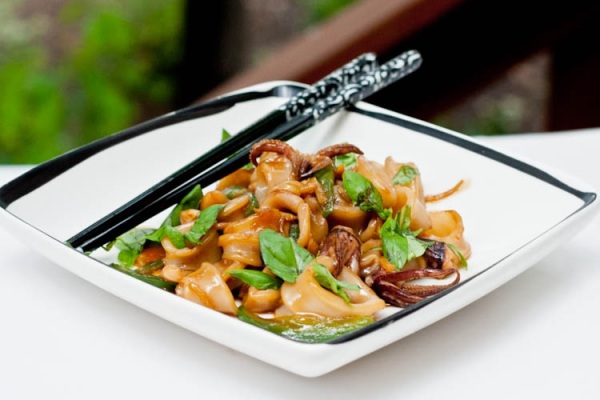
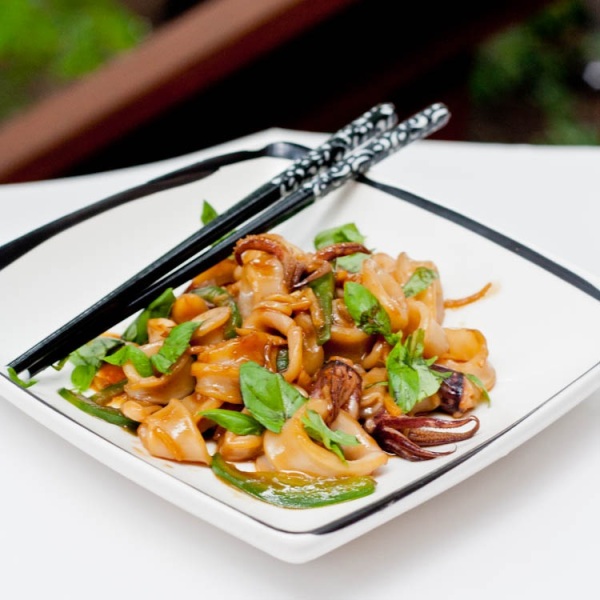
Three Cup Squid
Well after my long blogging hiatus I am back. Has it really been 12 days since I last posted a recipe? As much as I would like to give you a great reason for why it’s been so long, I’ve got nothing. Time has just been slipping away from me and my time management skills have completely let me down. On top of all this I’m becoming increasing more neurotic with a never ending to do list constantly running through my mind and only getting longer and longer. Enough of my ranting though, on to the recipe.
When you’re feeling short on time this is the perfect recipe, as long as you’re willing to venture into the world of cooking squid. I was feeling adventurous and finally felt ready to cook with squid for the first time. It’s actually nowhere near as intimidating as I thought it would be. Thanks to the folks at Whole Foods you don’t even need to clean it yourself – all you need to do is slice it into rings – that’s easy enough. Not interested in making the standard breaded and fried calamari, I browsed the internet, looking for a recipe with some Asian flair. I came across this recipe on the Rasa Malaysia blog and with a few substitutions I was able to tweak the recipe to match the ingredients I had on hand. The original recipe calls for sweet dark soy sauce which I substituted with oyster sauce, red chili which I substituted with a jalepeno, and thai basil for which I used just regular basil. The squid cooked surprisingly fast so be careful not to overdo it – it literally needs a 20 second blanching and then a few tosses in the wok to be fully cooked.
This dish is best served and eaten immediately as the squid can get rubbery when reheating. Overall a flavorful simple dish that takes less than 30 minutes to prepare.
Three Cup Squid
Recipe Adapted From Rasa Malaysia
Serves: 2
Start to Finish: 20-30 minutes
Ingredients:
12 ounces cleaned squid, cut into pieces
1 inch piece ginger, cut into matchsticks
6 cloves garlic, thinly sliced
1 1/2 tablespoons soy sauce
1 1/2 tablespoons Shaoxing wine
1 tablespoon oyster sauce (or 1 1/2 tablespoons sweet dark soy sauce)
hanful thai basil, coarsely chopped
1 teaspoon cornstarch mixed with 1 teaspoon water
1 red chili, deseeded and thinly sliced
1 tablespoon sesame oil
Directions:
1.Bring pot of hot water to a boil. Blanch squid for 20 seconds, drain and put aside.
2. Heat a wok over high heat and when hot but not smoking add sesame oil. Add garlic and ginger and cook 1-2 minutes.
3. Add squid and quickly stir it around a few times. Add soy sauce, Shaoxing wine, and sweet soy sauce to the wok. Toss to make sure squid is fully coated. Add chili pepper and cornstarch mix and toss until combined. Remove from heat. Sprinkle with thai basil.
English Muffin with Eggs, Avocado and Pesto
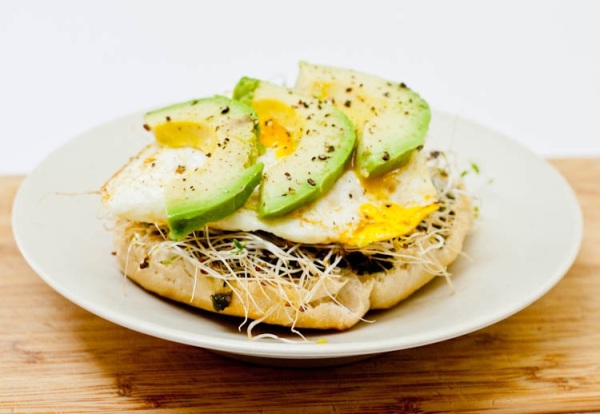
It’s always hard to go back to work after a long weekend, made even harder when you take an extra day off and turn it into a 4 day weekend. And even harder when you’ve been having this for breakfast for the last few days and now need to downgrade back to plain old hard boiled eggs at your work desk.
To be fair I suppose I could recreate this on a week day but frankly there’s nothing more important than sleep at 7am. I would seriously do my make up the night before if I knew I could sleep peacefully and wake up with eye liner and mascara in place. Since that’s not the case, to maximize sleep I make my breakfast and lunch the night before and apply my make up the morning of.
And so I wait for the upcoming Saturday when I can have this for breakfast again….
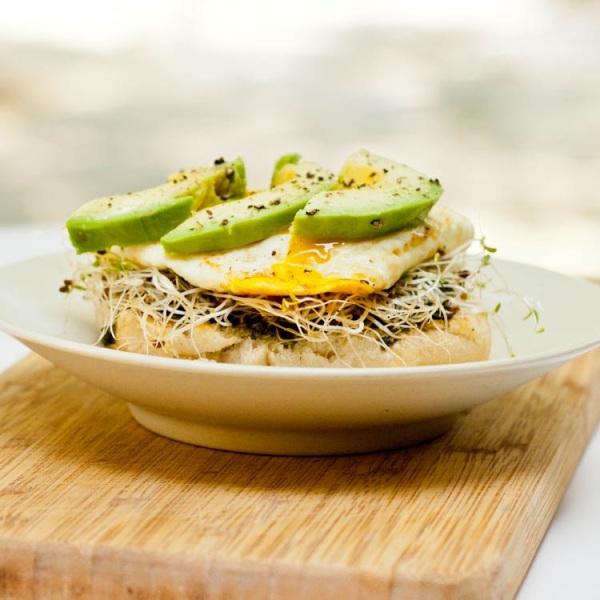
Overall this is easy to make and put together and the combination of flavors is great – toasted bread, smooth avocado, slighty gooey egg, garlicy pesto and fresh alfalfa -hmmm…. delicious.
English Muffin with Egg, Avocado and Pesto
Serves: 1
Start to Finish: 15 minutes
Ingredients:
1 english muffin, sliced in half and toasted
2 eggs
2 tablespoons basil pesto
1/4-1/2 avocado, sliced
lemon juice
salt, pepper,
1 ounce alfalfa sprouts
cooking spray
Directions:
1. Heat pan over medium-high heat. When hot add cooking spray and crack eggs into the pan. Cook until almost set, flip eggs over, pushing down on them slightly with a spatula, cook 1-2 minutes and remove from heat (cook longer if you don’t want the yolk runny at all) .
2. Spread 1 tablespoon pesto on each english muffin half. Add alfalfa sprouts, egg, avocado slices, squeeze of lemon juice, salt and pepper.
Daring Bakers May 2012 – Challah
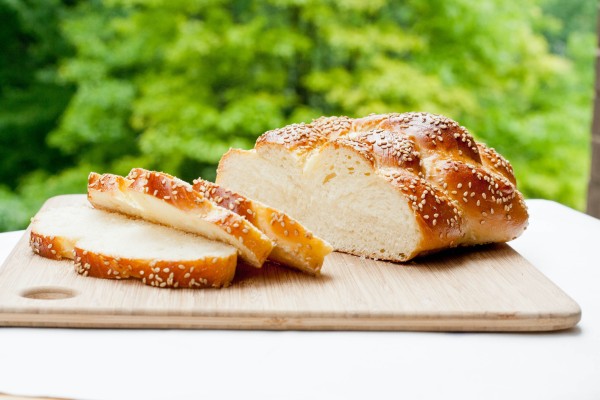
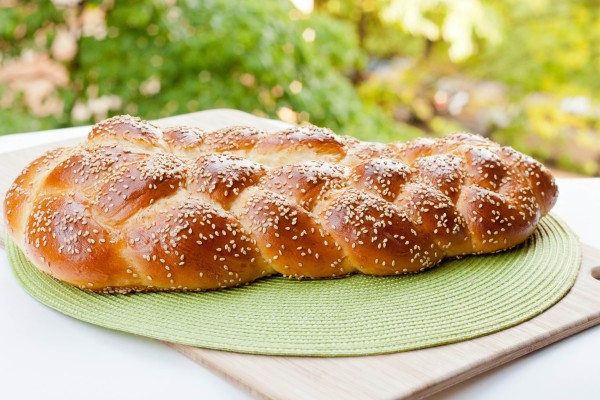
This month’s daring bakers challenge was to make challah – a bread that I’ve eaten many times but had never made myself. The recipe itself is pretty simple – calling for the standard baking ingredients – flour, yeast, honey etc. The interesting part comes in when you need to shape the bread – which is traditionally braided. There are multiple methods for this but I went with the simplest – separating the dough into three, rolling a snake out of each piece, and then making a three stranded braid. Can’t say I’ve ever braided dough before (and honestly it’s been years since I last braided hair) but the process went through without a hitch. The challah browned nicely in the oven and made for a great loaf. I’ve frozen the leftovers and hope to make french toast with it later this month so stay tuned for that recipe!
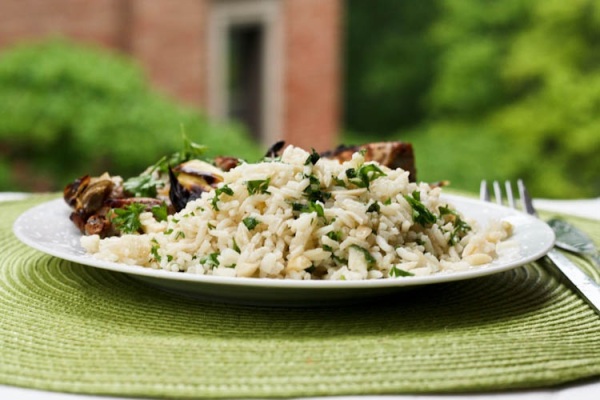
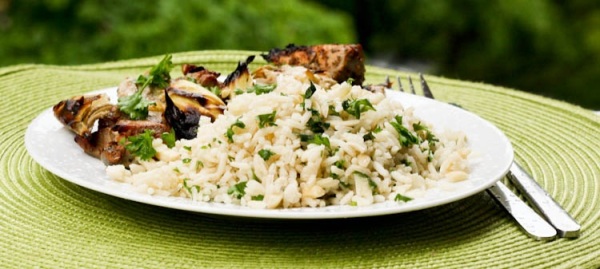
Almond Parsley Rice Pilaf
Rice should technically be pretty easy to prepare. It’s just rice and water – how complicated can that be? Yet in practice it actually is difficult to get the perfect texture and consistency of the rice. If you do it wrong you’ll end up with a mushy gloopy mixture which is just unpleasant to look at, let along put in your mouth.
What I love about rice pilaf is that it’s a lot easier to get it right. For some reason toasting the rice in the pan and mixing it with other ingredients before adding in the liquid always seems to produce a better texture in the final product. This is my go to rice pilaf recipe – one that I always pair with my broiled chicken with artichoke hearts (another keeper).
Don’t mind the water droplets on the plate — I was taking this photo on my balcony after work and with the daylight hours slipping away I couldn’t let the rain stop me.
Almond Parsley Rice Pilaf
Recipe Adapted from The Food Network
Serves: 4
Start to Finish: 35 minutes
Ingredients:
3 tablespoons butter, divided (use olive oil if vegan)
1/2 large onion, diced
1/3 cup slivered almonds
1 cup long grain rice
2 cups chicken broth (vegetable broth if vegan)
salt, pepper, to taste
handful fresh parsley, chopped
Directions:
1. Over medium heat melt 2 tablespoons butter (or oil) in a pot. Add onions. Cook until translucent, stirring occasionally.
2. Add almonds and cook until starting to brown, stirring occasionally.
3. Add rice, cook and stir 1-2 minutes.
4. Add chicken (or vegetable) broth. Bring to a boil. Reduce heat to low, cover and simmer 15-20 or until rice is cooked through.
5. Add parsley and 1 tablespoon butter and fluff with a fork.
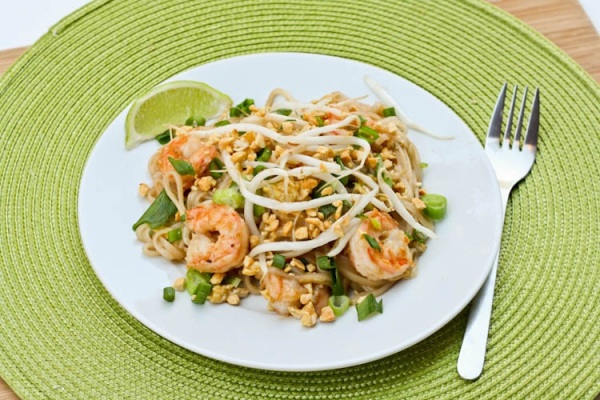
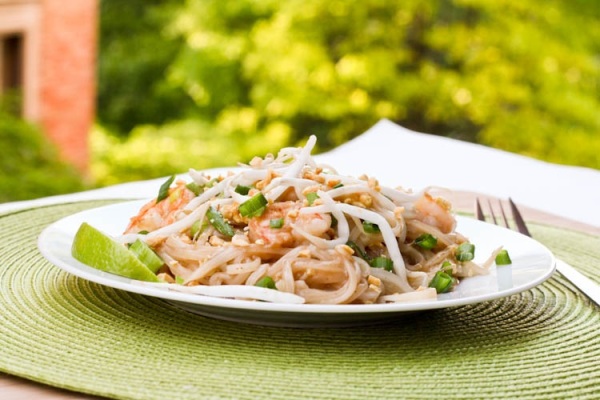
Pad Thai
Pad Thai is seriously one of my all time favorite dishes. I just can’t get enough. I used to buy those pre-made sauce mixes but eventually I knew I needed to work up to the real thing – making the sauce from scratch. The star ingredient is tamarind – which apparently can be substituted with lime juice but the final result is just not the same. You really must invest in tamarind – a seemingly foreign substance – which in its natural form is a pod like fruit but can be bought in blocks (with the seeds) or in a concentrated liquid form. The tamarind provides the tart/sweet flavoring to the sauce – to be balanced out by the salty fish sauce.
I chose to buy the block form on Amazon, which you then soak in hot water and drain through a sieve to separate the seeds from the liquid. This is really the only intimidating part of the recipe. The rest of the ingredients can be found in the regular grocery store and are easy to work with.
Pad thai is a meal that comes together quickly and is packed full of flavors. I really can’t wait to travel to Thailand and eat this day and night!
Pad Thai
Recipe Adapted from Pink Parsley
Serves: 4
Start to Finish: 40 minutes
Ingredients:
2 tablespoons tamarind pulp
3/4 cup boiling water
3 tablespoons fish sauce
1 tablespoon rice vinegar
3 tablespoons sugar
1/2 teaspoon cayenne pepper
4 tablespoons sesame oil, divided
8 ounces rice noodles
2 eggs
salt,
12 ounces shrimp, peeled
3 cloves garlic, minced
1 shallot, chopped
6 tablespoons roasted peanuts, chopped
6 ounces bean sprouts,
5 scallions, thinly sliced
1/4 cup cilantro
lime wedges
Directions:
1. Soak tamarind in boiling water 10-20 minutes. Using a sieve strain the tamarind, separating the seeds from the liquid and squeezing out as much pulp as possible. To the tamarind pulp add fish sauce, rice vinegar, sugar, cayenne pepper and 2 tablespoons sesame oil.
2. Cook noodles according to package directions – under cooking by a couple of minutes. Rinse with cold water, drain and set aside.
3. Beat eggs with a pinch of salt.
4. Heat wok over high heat and add 1 tablespoon sesame oil in a wok when heated through. Add shrimp, sprinkle with salt and cook until cooked through. Set aside.
5. Add 1 tablespoon sesame oil to the wok and add shallots and garlic. Cook until just starting to brown, 1-2 minutes. Move the shallots and garlic to the side and add the eggs to the pan. Stirring constantly, cook until eggs just starting to set, less than 30 seconds.
6. Add rice noodles to the wok and toss to combine. Add sauce mixture, mixing to combine. Cook over high heat, stirring constantly until the noodles are coated in the sauce.
7. Add 1/4 cup peanuts, bean sprouts, shrimp and half the scallions to the pan. Continue to cook, while tossing the mixture until noodles are cooked through, 1-2 minutes.
8. Serve sprinkled with remaining peanuts, scallions and the cilantro. Drizzle with lime wedges.
Peanut Butter Graham Cracker Balls
Peanut butter balls/truffles make for a simple no fuss dessert. There’s no baking required, very little mixing, no waiting for the eggs and butter to warm up to room temperature. Just a few ingredients and steps to follow. Though I never partake in the eating process here I know most people fully enjoy this treat (D especially). I used to make these peanut butter balls, but when the confectioners sugar ran out I decided to substitute it with graham crackers crumbs. Not a bad taste combination. I’ve made these both with regular and natural organic peanut butter and it works either way. The only difference being how much graham cracker crumbs you need to add – the natural peanut butter is a lot more liquidy than the regular so you need to add at least 1/2 cup more graham cracker crumbs. Best of all these keep for at least a week in the fridge — if they last that long!
Peanut Butter Graham Cracker Balls
Makes: 20-24 balls
Start to Finish: 1 hour
Ingredients:
1 cup peanut butter
1 1/4 – 2 cups graham crackers crumbs
5-6 ounces crushed heath bars
4-5 ounces chocolate, broken up into small pieces
Directions:
1. Add graham crackers to food processor and process until mixture resembles crumbs. Add 1 cup graham crackers crumbs to the peanut butter. Mix. Add more graham cracker crumbs until mixture is dry enough to be able to form balls.
2. Using your hands form the dough into 24 even sized balls. Place on aluminum foil lined baking sheet/cutting board and freeze for 30-60 minutes or until firm.
3. Using a double boiler heat chocolate, stirring until melted. Placed crushed heath bits in a small bowl.
4. Using a fork dip peanut butter balls in the melted chocolate, one at a time, and then toss in the heath bits. Refrigerate until firm.
Daring Cooks May 2012 – Boeuf Bourguignon
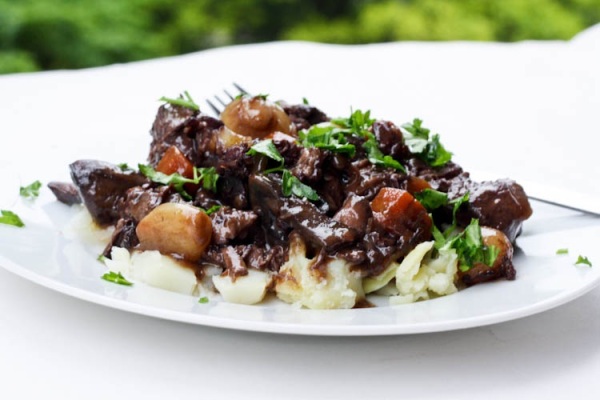
This month’s daring cooks challenge was to make Julia Child’s boeuf bourguignon. I hadn’t even heard of Julia Child before the Julie and Julia movie came out, but since then I’ve browsed through her numerous cookbooks and even read her memoir My Life in France, practically drooling over the meal descriptions. Seeing as how this is one of her most famous dishes I’ve wanted to make this for a while, but without a clear cut assignment ahead of me I’ve always found excuses and procrastinated tackling this dish. Though the length and expensive ingredient list can be discouraging the final result is worth both the money and the effort.
Though D and I have essentially stopped eating red meat (apparently I am an incredibly impressionable person because after Omnivore’s Dilemma and countless articles online I’ve drastically changed my daily food decisions) I figured I would make an exception for this recipe. Four hours and a hike through the Rock Creek Park later (is it bad that I leave the house when the oven is on for hours?) dinner was ready. And what a delicious meal it was. Who knew that those incredibly annoying to peel pearl onions could taste like little balls of goodness after a sautee and simmer in beef broth? I knew the beef would be incredibly tender – after 3+ hours of cooking how could it not be, but I wasn’t imaging the complexity and depth of flavor in the sauce. The color alone – more of a deep purple than a dark brown, was incredible. Naturally I licked my plate clean – and then went for seconds…. and thirds…
A truly magnificent recipe, and I look forward to delving deeper into Julia Child’s world of cooking.
Avocado Chickpea Salad with Vegan Pesto
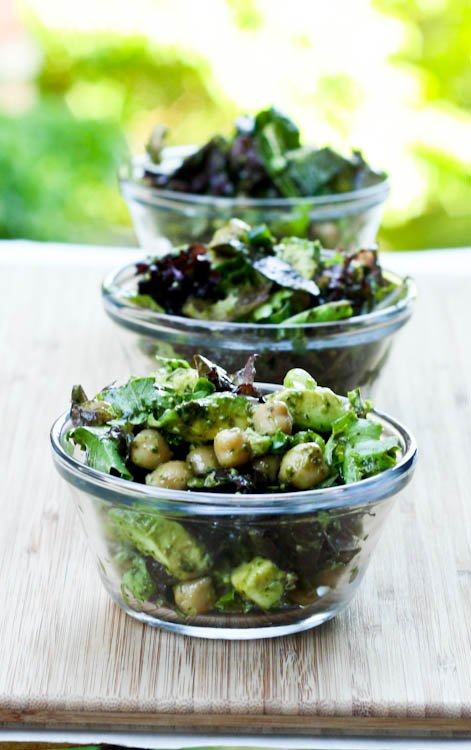
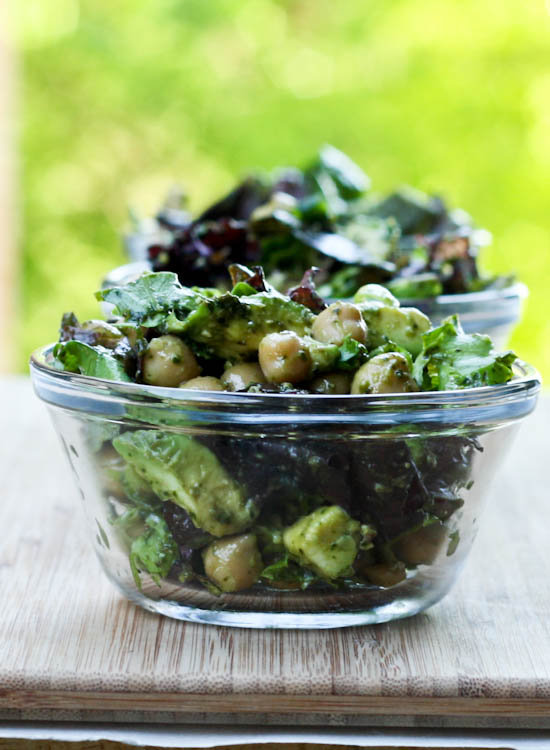
This is a pretty simple salad I just randomly threw together one day. I’d been seeing a lot of these smashed chickpea avocado sandwich spread recipes online and figured it would be just as delicious in a salad with some basil arugula pesto as the dressing. If salads aren’t your thing use a potato masher to squash the chickpeas down a little bit and just spread between two slices of bread for a quick lunch. I prefer this as a salad though – always overestimating how hungry I am and spending hours feeling stuffed afterwards – thanks to the filling aspect of both avocados and chickpeas.
Avocado Chickpea Pesto Salad
Start to Finish: 10-15 minutes
Serves: 2-4
Ingredients:
1 can chickpeas, rinses and drained
1 avocado, cubed
lemon juice
salt, pepper,
2 scallions, chopped
2 handfuls spring mix or arugula, sliced
4 tablespoons vegan basil arugula pesto (recipe below)
Directions:
1. Squeeze lemon juice over cubed avocado. Combine ingredients in a large bowl and enjoy (mash chickpeas beforehand if using this as sandwich filling).
Vegan Arugula Basil Pesto
Makes: 3/4-1 cup
Start to Finish: 15 minutes
Ingredients:
3.5 ounces basil (1 large box)
1/2 cup arugula
1/2 cup olive oil
1/4 cup walnuts
3/4 teaspoon salt
pepper
2 cloves garlic
Directions:
1. In a food processor combine basil, garlic, walnuts, arugula, salt pepper. Start to process, pouring olive oil through feed chute. Process until smooth.


